Requirements #
For this Demo it is recommended to use a FC602/FC612 Stick with NXP TJA1101B.
The NXP TJA1101A is expected to perform well in most cases, although it is not full TC10 compliant.
To determine which TJA1101 is installed on your FC602/FC612, you can verify the PHY-Type using PHY Control NXP.

Download #
Download the latest PHY Control NXP application here: ![]() FibreCode HiDrive Downloads
FibreCode HiDrive Downloads
Upon power-up, the NXP TJA110x is not configured for the TC10 standard. Use the Python GUI described here to set the TJA110x to standard TC10 mode.
Sleep/Wake-up Demo #
In this brief demonstration, we show the Sleep/Wake-up functionality. We will run two cycles to illustrate the control of both master and slave devices:
- Master → SLEEP/WAKE-UP → Slave
- Slave → SLEEP/WAKE-UP→ Master
Hardware Setup #
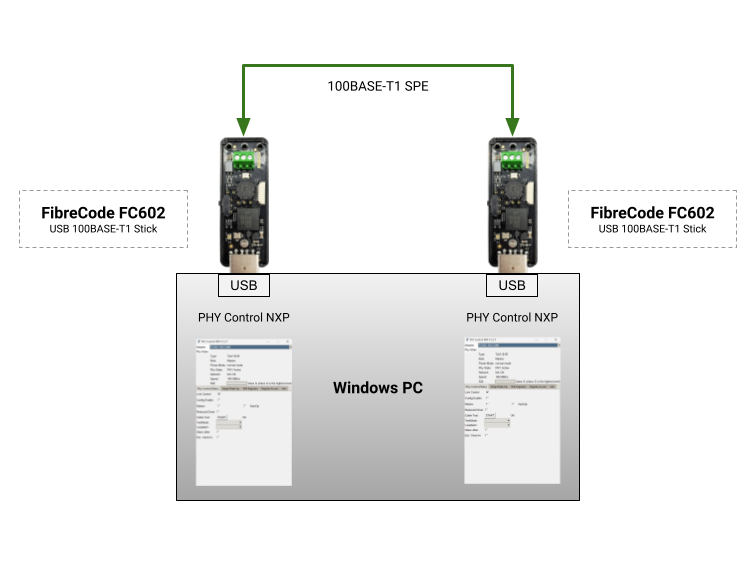
In this example, we utilize two FC602 USB 100BASE-T1 Sticks on the same host. Ensure that one operates in master mode and the other in slave mode, ensuring the link is active
Enable TC10 functionality #
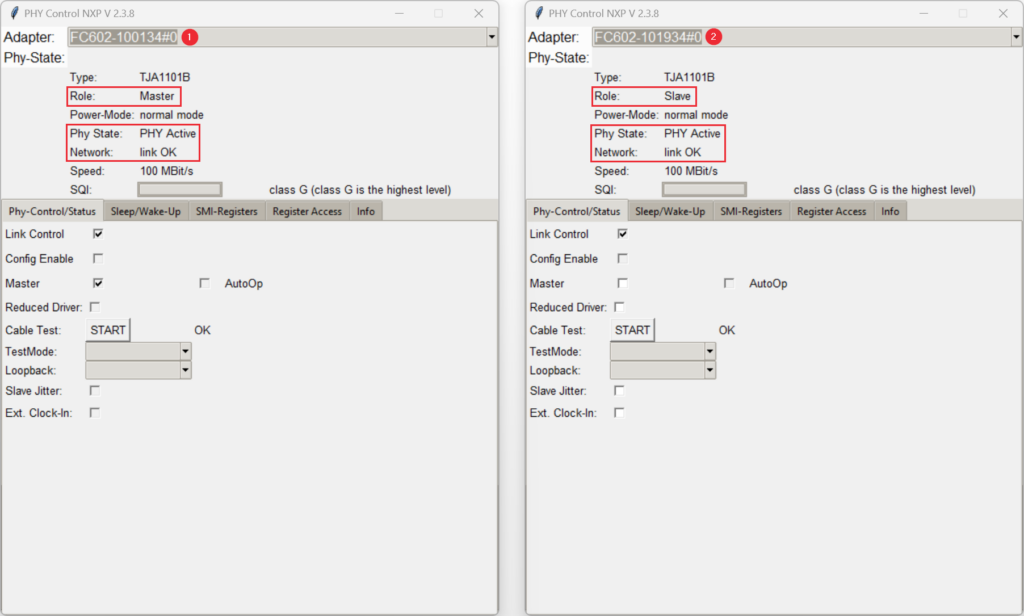
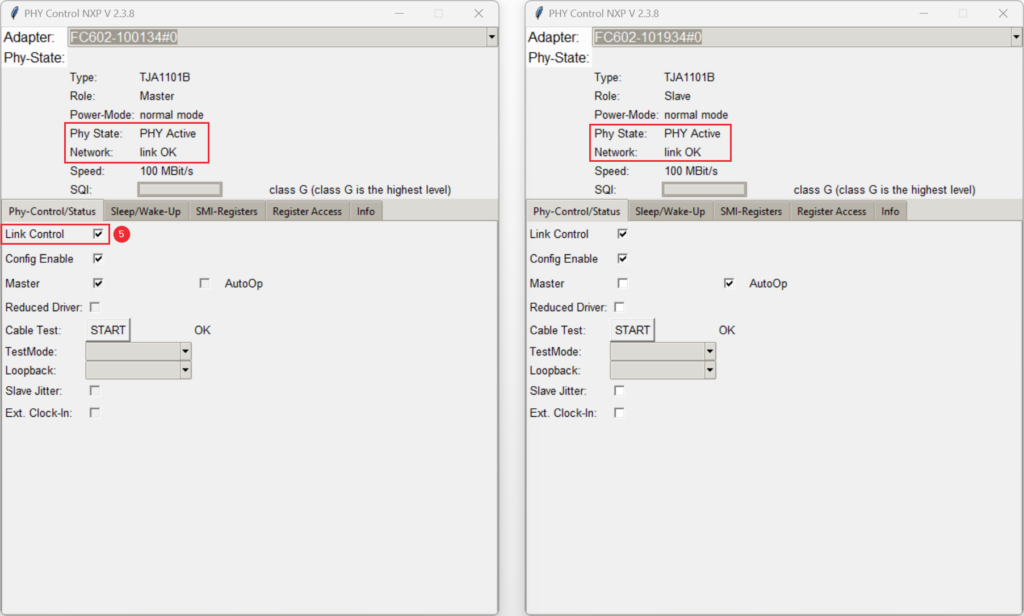
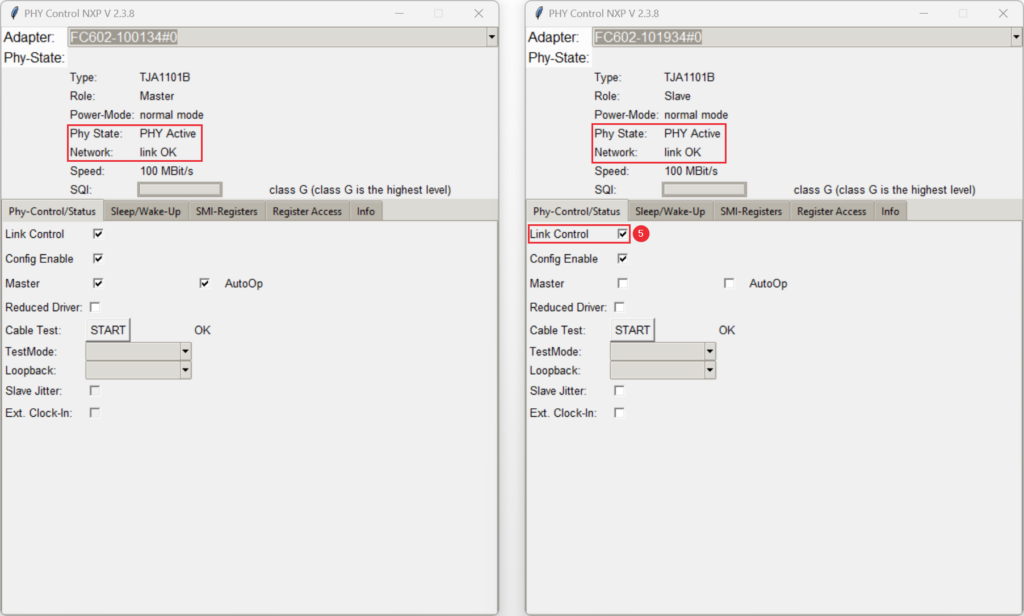
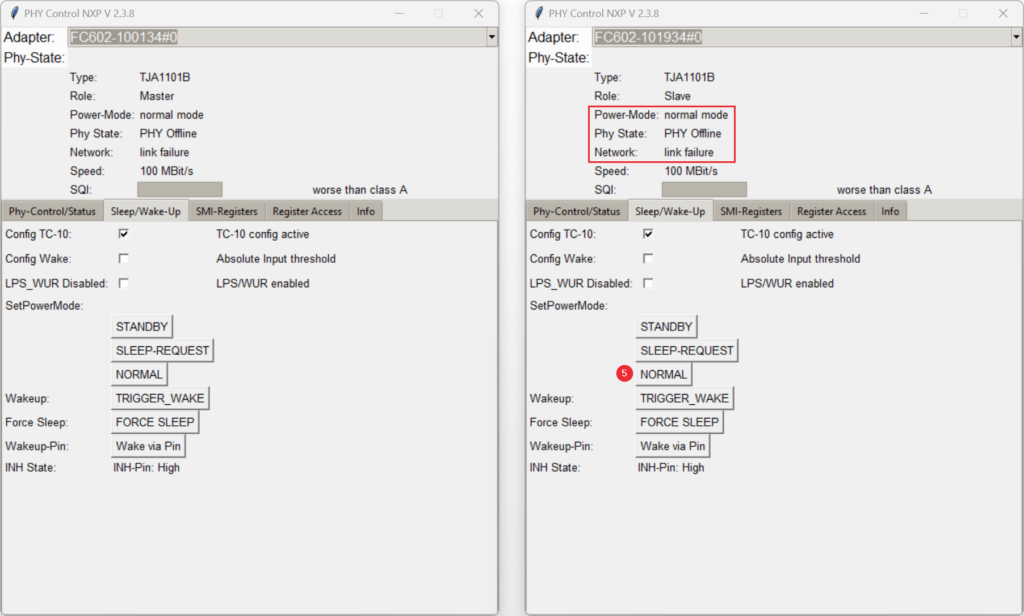
Start two instances of PHY control NXP and select connected Sticks. Verify master/slave- and link status.
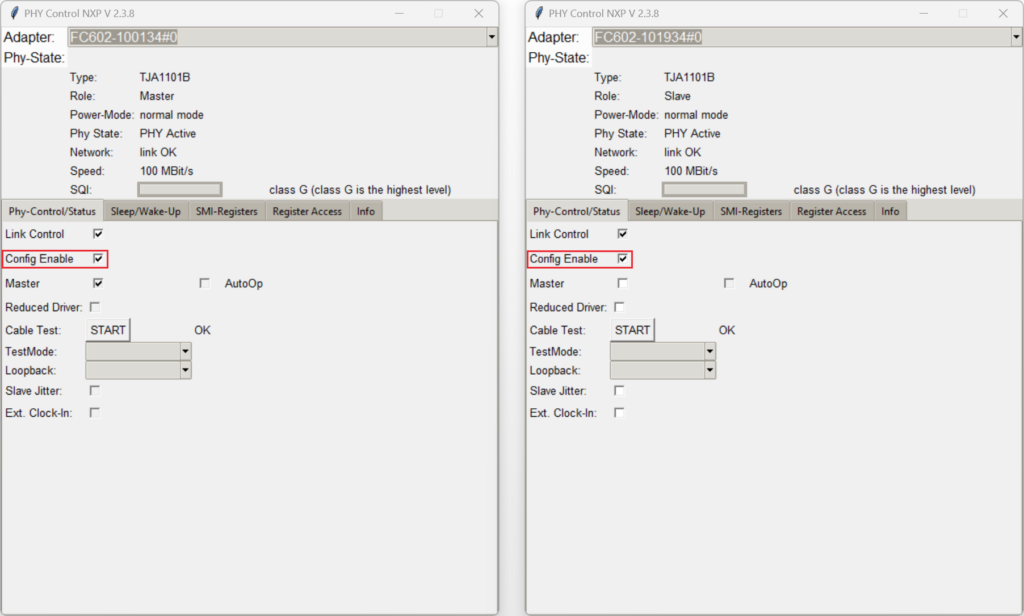
Config Enable must be active to control register write access. Enable on both devices.
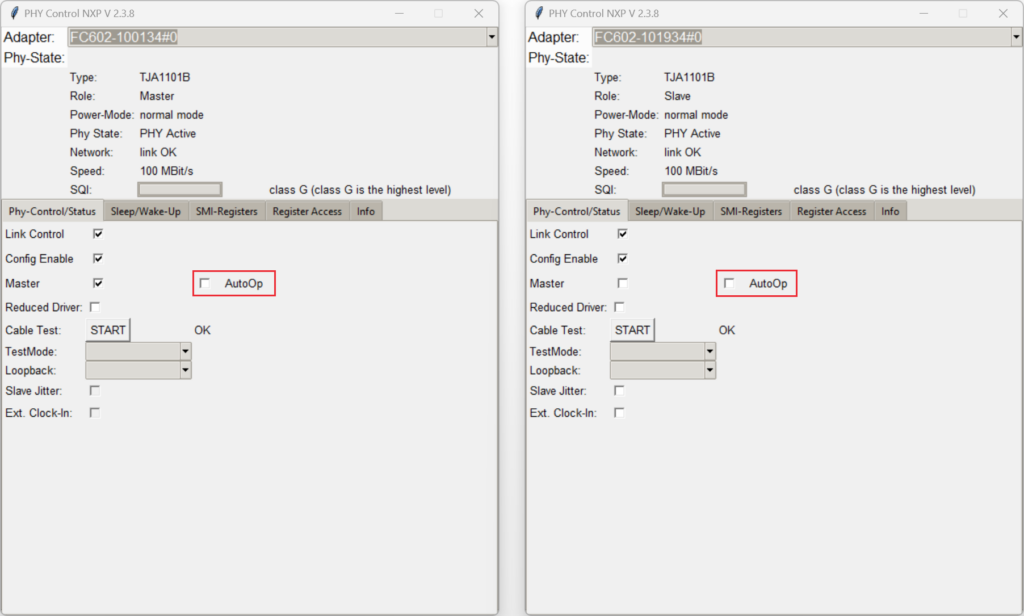
Verify, if autonomous or host-controlled behavior is needed. AutoOp checkbox can be activated to bring NXP TJA110x in right mode.
Note: This will change behavior of TC10 state-machine. More details can be found in TJA110x datasheet.
In this demo, we are using AutoOp exclusively on the device we are waking up. (More information will be provided in later steps)
Now go to Sleep/Wake-up Tab and enable Config TC-10 on both devices.
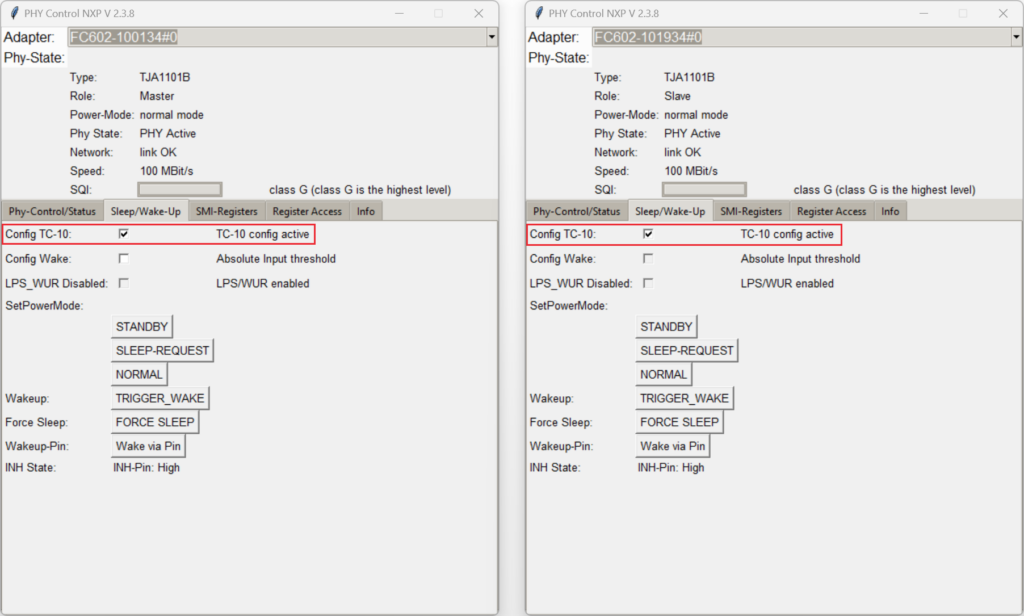
After enabling the TC10 checkbox, the NXP TJA110x will now operate in accordance with the Open Alliance TC10 specifications for 100BASE-T1 Sleep/Wake-up functionality.
Controlling SLEEP/WAKE-UP on the Master Device #
On slave device:
Enable AutoOp to bring it automatically in right state after wake-up.
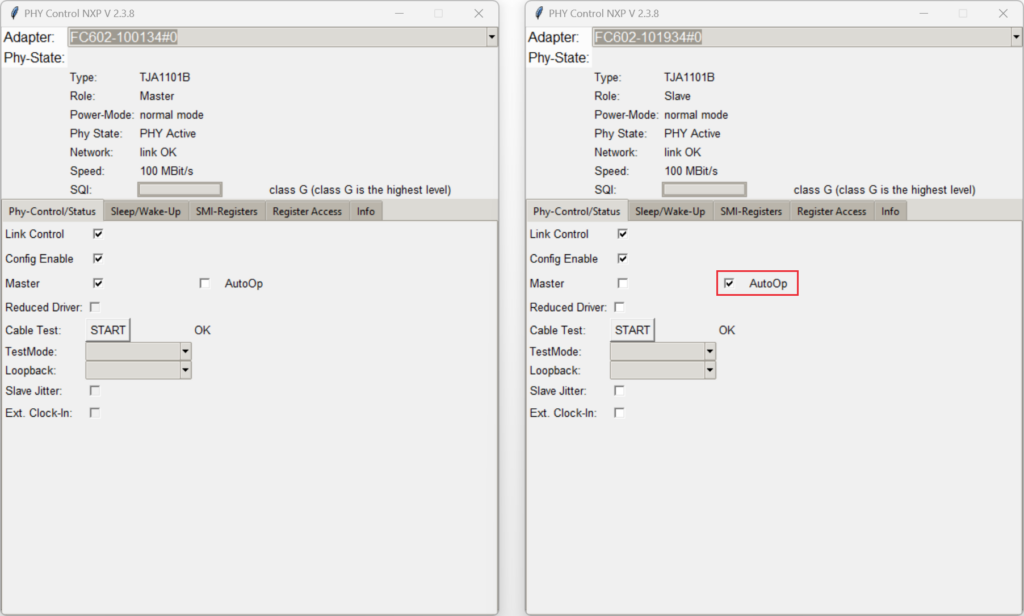
On master device:
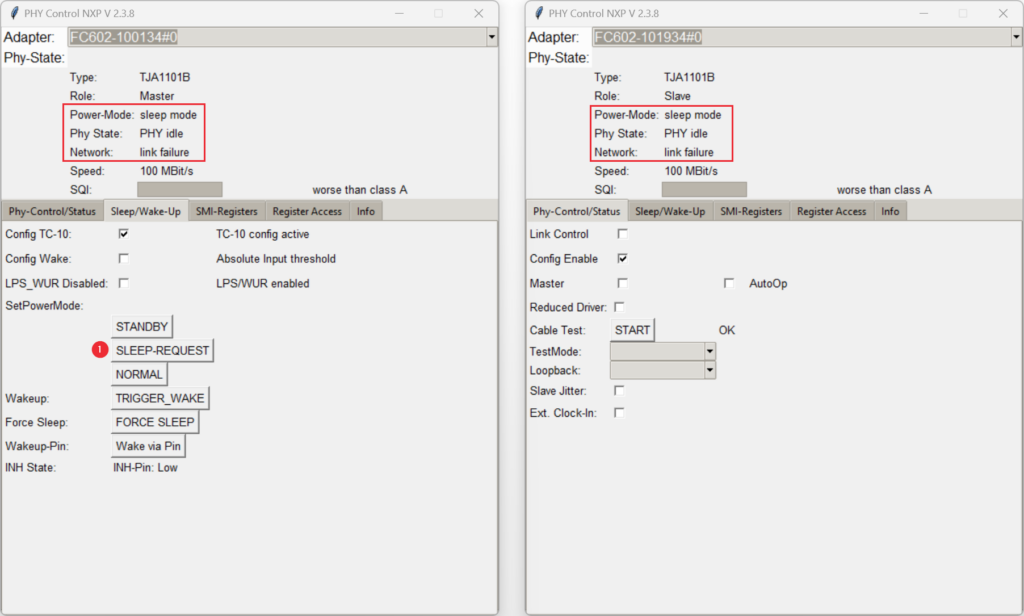
1. Send SLEEP-REQUEST. Both devices go to sleep mode and link is disabled.
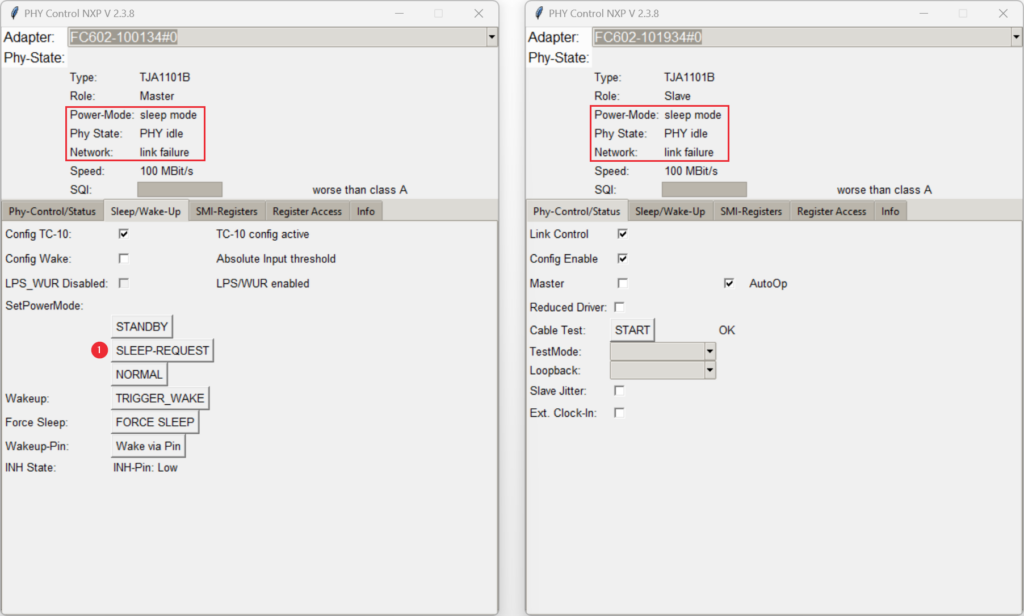
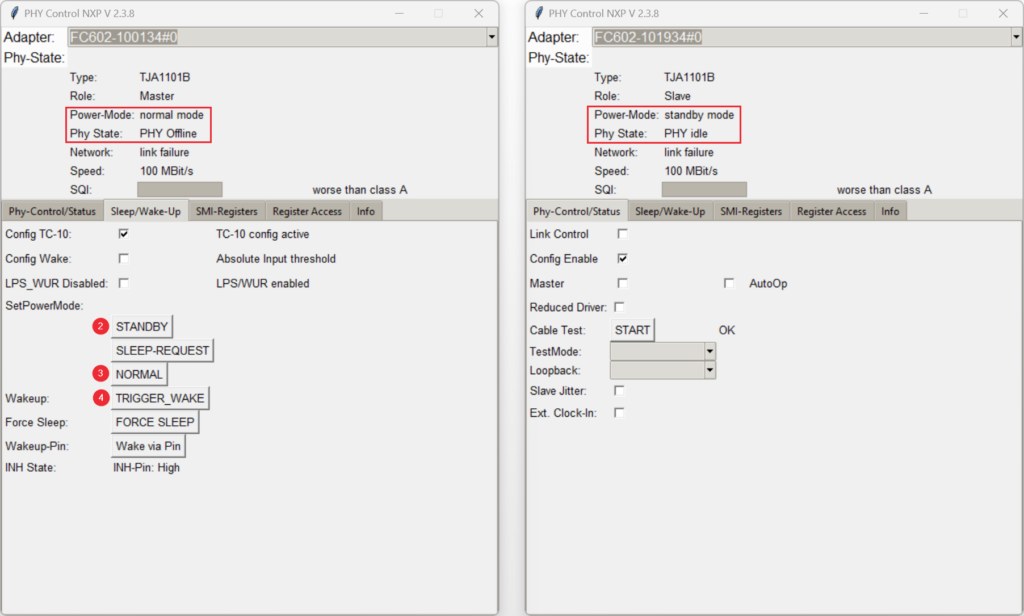
2. Set PHY in STANDBY mode.
3. Set PHY in NORMAL mode.
4. Send TRIGGER_WAKE to wake slave device.
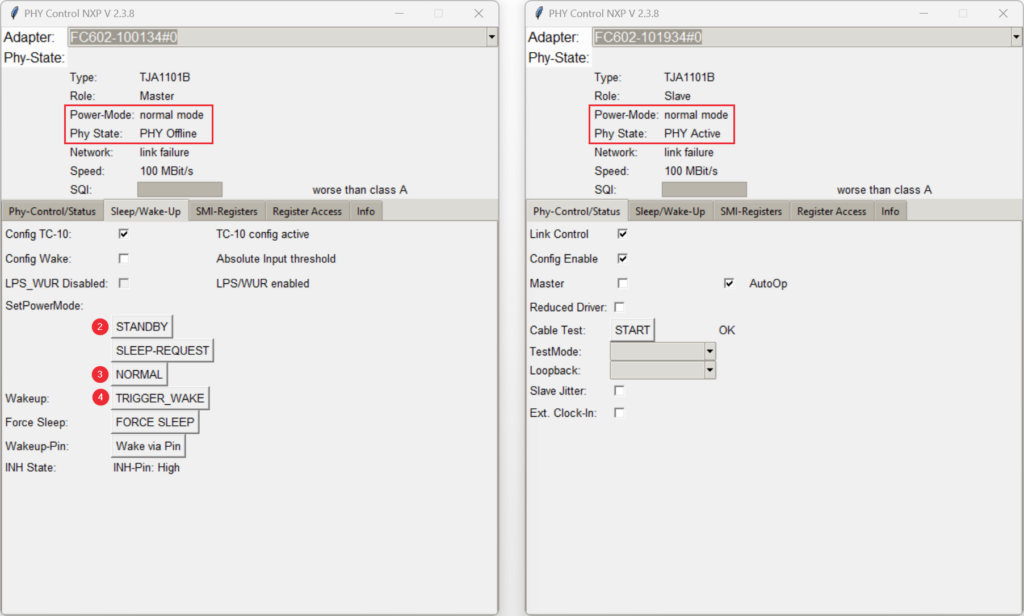
5. Enable Link Control on both devices to restore the link. (On the slave device, the link will be automatically enabled because AutoOp is active)
Controlling SLEEP/WAKE-UP on the Slave Device #
You can repeat the same steps for the slave device.
On master device:
Enable AutoOp to bring it automatically in right state after wake-up.
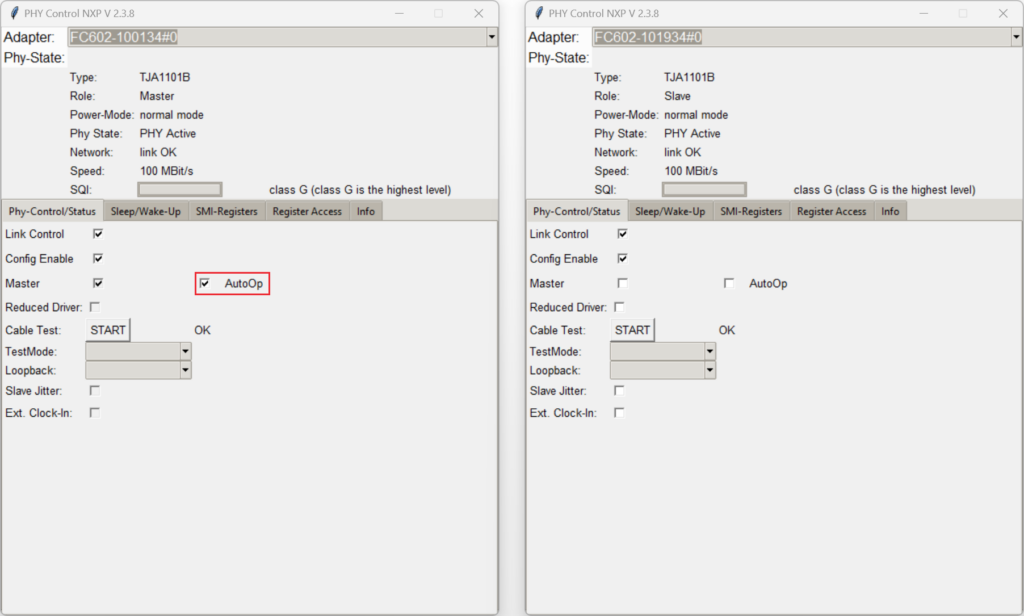
On slave device:
1. Send SLEEP-REQUEST. Both devices go to sleep mode and link is disabled.
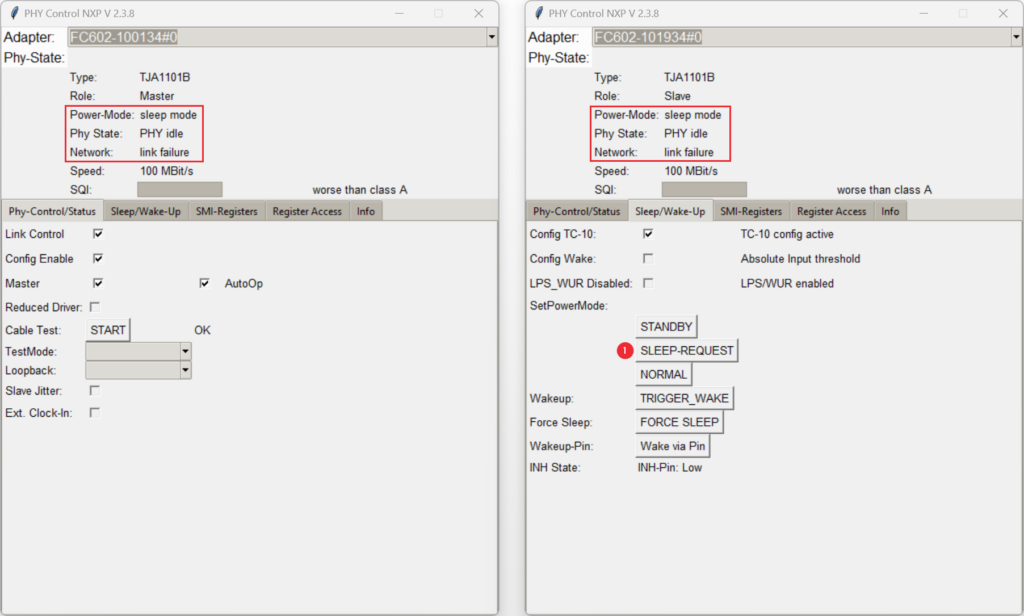
2. Set PHY in STANDBY mode.
3. Set PHY in NORMAL mode.
4. Send TRIGGER_WAKE to wake slave device.
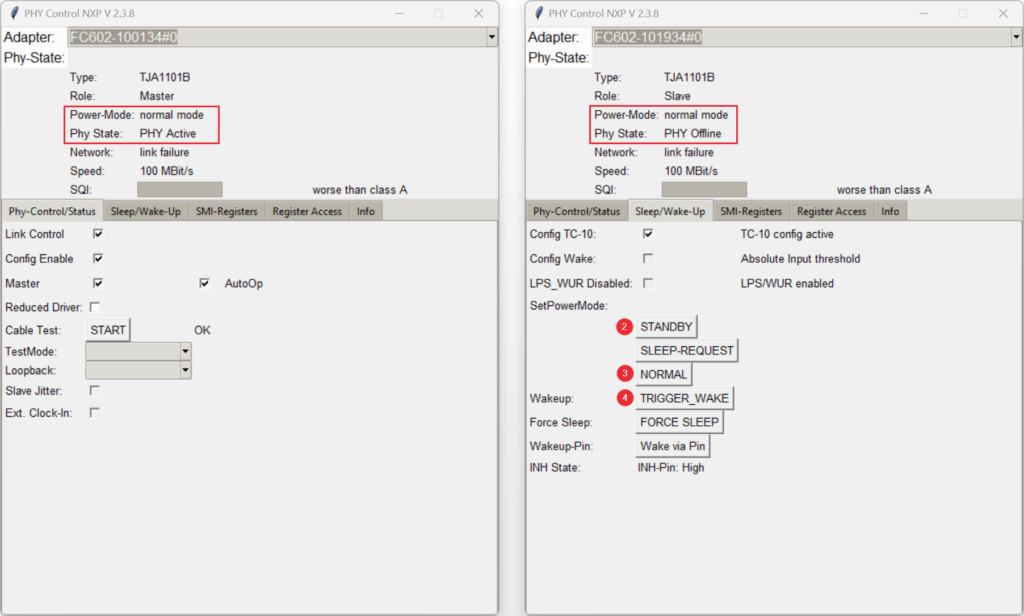
5. Enable Link Control on both devices to restore the link. (On the master device, the link will be automatically enabled because AutoOp is active.)
SLEEP/WAKE-UP without AutoOP #
Leave AutoOp disabled on both devices.
On master (or slave) device:
1. Send SLEEP-REQUEST. Both devices go to sleep mode and link is disabled.
2. Set PHY in STANDBY mode.
3. Set PHY in NORMAL mode.
4. Send TRIGGER_WAKE to wake slave device.
5. Since AutoOp is disabled, the PHY on the slave device must be manually set to NORMAL mode.
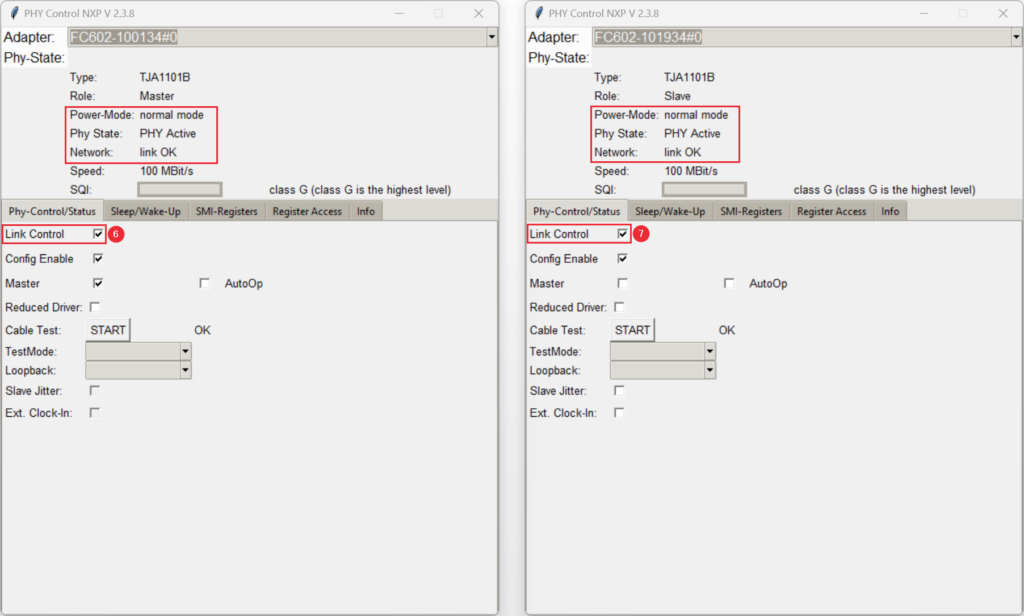
6. Enable Link Control on master device.
7. Enable Link Control on the slave device. (The link will not be enabled automatically since AutoOp is disabled)
